Showing posts with label Ranger Ink. Show all posts

Wednesday, January 15, 2014

WOYWW #241 - The Aftermath

I was up late crafting on Monday evening. I posted yesterday the cards that I completed. Since today is Wednesday, I am sharing what is on my desk with you, but I have to warn you - it isn't pretty!


You will notice that I am not the neatest painter around! I must say the use of alcohol wipes are making my life a lot easier as I use them to clean off my stencils and craft mat.

Thank you to Julia for the desk hopping fun! Hope to visit with a lot of you today and see what you are working on. Off to clean this desk off so I can have some inky fun tomorrow!

Thursday, January 31, 2013

Timeless Tag

Hi, guys! It is tag time again!  I am participating in the Tim Holtz 12 Tags of 2013.  I had such a blast participating last year and even was a winner in December.  My friend Ruth loves my tags.  She has asked that I make them for her, so when I can, I will be making two each month and will be giving one to her.

I am very happy with how they turned out.  Distress inks and Distress stains (even the metallics) were used.  I didn't have the cute finger stamp Tim used, so I decided to use various arrows on mine.  Being the klutzy person I am, I was hesitant to cut my embossing folder as instructed. Now, I know X-Acto knives and myself do not play nice together.  My late hubby used to hide them from me.  I didn't cut myself, but I did cut my folder completely in half instead of just enough to insert the tag.  I was able to do this to another of my folders with no incident, but not this time.  Packing tape came in handy to mend it.


If you would like to learn some cool techniques and have a lot of fun, I would highly recommend you take part.  I can't wait to see what Tim comes up with for February!

Until next time!

Saturday, December 29, 2012

Tag a-long with Tim

Hi, guys!  As many of you know, I have been taking part in the Tim Holtz 12 Tags of 2012.  Today I will be sharing the last two tags I completed for the December challenge.  All the products I used on these tags are Ranger and Tim Holtz products.


These were so fun to make.  When I work on any of Tim's tags, I end up using a lot of different products and techniques.  While working on these, I used Distress Inks, Distress Stains, Distress Markers (notice a pattern?).  I really enjoyed using the mirror sheets in the first one, as they are so pretty in person and so reflective and die cut very easily.  The poinsettia die was a fun one to use and I enjoyed using acrylic paint and the tissue tape.

Sad that the 12 tags are now complete, but feel so happy that I was able to complete them ALL!  I am hoping Tim continues this tradition in 2013!

Off to see the Nutcracker with my hubby and niece.  I cannot wait!  My niece has been doing ballet since she is 3 and now is 8 and so it is the perfect age for her to experience her first ballet.  Lincoln Center is just so beautiful and I can't wait to share the experience with her.

Have a great weekend!  Until next time!


Thursday, August 2, 2012

Drac is Back!

Hi, guys!  Yes, you read right!  Drac is back!  I decided to do a Halloween tag last night.  I am participating in the Tim Holtz 12 Tags of 2012.  In July, Tim demonstrated the alcohol ink splatter technique using a can of air.  I made a tag in the beginning of the month for the Fourth of July.  It dawned on me that this splatter technique would be fun to use for blood splatter.  Yes, I know, I am a bit gross.  I guess it is from years of mystery reading. 


Supplies:
Stamp: Craft Smart, Stampers Anonymous
Ink: Archival Black, Adirondack Alcohol Ink, Distress Stain, Distress Inks
Misc.: Tissue Tape (Tim Holtz), Tim Holtz Ribbon 


I had a blast doing this card.  My workspace ended up looking a bit like a crime scene when I was done, and my hands resembled those of Lady Macbeth.

Hope you have a great day, and hope you find a few moments in the day to do something you love.  Maybe get inky?

Friday, July 20, 2012

July Design Team Submissions III- The Finale

Hi, guys!  Hope all is well.  Today I will be sharing the final cards for the July Design Team Submissions of The Ink Pad NYC.

The first card I am going to share with you today incorporates both stamping and using dies for the butterflies.  I used images from Stampers Anonymous from the Nature's Discovery Set.  I also sprayed Dylusions spray inks on paper and cut out tiny butterflies using The Memory Box Die Butterfly Delights. They are so adorable!  Using the spray this way made them all different.   The background was embossed using the Tim Holtz embossing folder Honeycomb.


For the last card, I decided to use black glossy cardstock for the base.  I used Maya Road Stamps for the butterflies.  I am really enjoying the new Summer Distress Ink colors, so I used them for the images.  I used twine for the butterfly trails.  To make them stiff, I used Claudine Hellmuth Matte Medium.


My four-month term on the design team is ending this month.  I want to thank The Ink Pad NYC for allowing me to be on their first design team.  It meant a lot to me and I hope you enjoyed my creations. It sure was a lot of fun for me.

Hope you find a few moments in your day to do something you love!


Wednesday, July 18, 2012

July Design Team Submissions II - Fluttering By

Hi, guys! Hope you are all doing well today.  I am sitting here in front of my air conditioner (literally!) as I write this post.  I am sure hoping this heat breaks before it breaks me!

I thought I would share the next two cards I made for the July Design Team of The Ink Pad NYC.  The theme this month was butterflies.  I also had to incorporate the Ranger Dylusion sprays, and wooden buttons.

I decided to use dies instead of stamps for the butterflies this time.  I used the Memory Box (Moonlight Butterfly) die to cut out some butterflies after I sprayed the papers with  Dylusions sprays.  It was a fun way to add color to them.  The background is embossed with a Tim Holtz Embossing folder. I also decided to spray the wood button and it worked great. The sentiment I stamped on the butterfly is from Maya Road.


For this next card, I decided to use one large butterfly from Hero Arts/Basic Grey from the Butterflies Print set.  I thought it would be fun for this one to keep it one solid color to show the print on it.  I scored the card along the bottom and inserted the sentiment there.  I thought this green and brown wooden button would go nice with it.


Hope you like these cards.  It is a lot of fun sharing them with you.  I hope you find a few moments in your day to do something you love!   Until next time!

Wednesday, July 4, 2012

Happy 236th Birthday, America!

Hi, guys!  Hope you are having a great Fourth of July!  My husband and I are staying home this year as it is mid-week and don't feel like running around in this heat.  We are going to spend time working on my stamp room and having a barbecue.

I thought I would share a few cards I made for the holiday (yes, I sent a few Fourth of July cards!).  This first one was made for our friend Michael.  He is a history professor and actually sent us a card and noted that it is the 236th birthday of our great country.


Stamps: Viva Las Vegas Stamps, Papertrey Ink
Paper: Papertrey Ink
Ink: Memento Black
Misc.: Really Reasonable Ribbon, Copic Markers, Felt Star


The next two cards I made for our parents.  I used the splatter technique that Tim Holtz showed for his new July 2012 tag. I thought it would be fun to use on these.  They mimic fireworks.


Stamps:  Stampsmith, Papertrey Ink
Paper: Ranger Gloss White, Papertrey Ink White
Ink: Archival Black (for Lady Liberty), Alcohol Inks, Archival Blue (Sentiments), Stampin' Up Red
Misc: Really Reasonable Ribbon, Tim Holtz Vintage Labels 

May each of you have a safe and fun-filled holiday!  I hope you will join me in taking a moment from our festivities to give thanks for this great nation and for all those who are currently serving in our military who are sacrificing so much to keep us safe and sound.


Sunday, July 1, 2012

June 2012 Tim Holtz Tag - Remembrance

Hi, guys!  Hope you had a great weekend - I did.  Started it off with a great ladies night out to celebrate my friend Asia's birthday.  Nothing better than spending a night out with great friends to start the weekend off on a fun note.  Today my husband and I spent some time in IKEA again to pick up more stuff for my stamp room.  I think they will know us by sight soon at this rate!

Tonight I took some time to complete my two tags for the Tim Holtz Tags of 2012.  These are done monthly and, of course, it is the last day of the month and I was under the wire by 40 minutes! Tim taught us how to tint photos to give them a vintage look.   I was not sure what photo I wanted to use, so I decided to do two tags.  I started by using an old childhood photo of my late husband Charlie.  I thought it was an adorable picture that captured his personality.  I used distress inks to tint the photo.  I only colored his coat (Fired Brick) and bow tie (Salty Ocean).  I used Antique Linen to age the photo and Vintage Photo along the edge.   While doing this tag, I decided to incorporate his love of bicycle riding by using tissue tape.  For the embellishment, I went with the metal angel wings by Tim Holtz.   Charlie is now my guardian angel and I thought they would be a great touch.


For the next tag I decided to use a photo of my late mother-in-law Elsie on her wedding day.  I used distress inks to tint her bouquet and the same Antique Linen and Vintage Distress inks to age the photo. She was married in 1942, so I used the Tim Holtz Alphanumeric stickers for the year.  I stained a portion of a rose ribbon to make the flower and incorporated an old vintage stick pin as an embellishment.   I used the alphabet paper for this tag as Elsie was a teacher her entire life.  Even after she stopped teaching school, she continued to teach those around her every day.


I enjoyed making these tags.  I found them extra special to do since I made them in remembrance of two people who I was lucky enough to love and share my life with.

Hope you have a great day and find some time to do something you love.

Thursday, June 14, 2012

You're A Grand Old Flag

Hi, guys!  Happy Flag Day!  Believe it or not, I send Flag Day Cards.  I am one of 6 siblings and my youngest sister inadvertently started this tradition.  My sister is rather sarcastic in nature and very flip sometimes.  When I started making cards a while back, I made her one for July 4th. She looked at me and said "You would make a card for any holiday, even for bleeping Flag Day!"  I just laughed it off.  My late hubby Charlie witnessed this exchange and for the next ten months began saving flag stickers, labels and whatever flag-related item he came across.  I didn't know this until the end of May when he presented me with an envelope of his finds.  He told me to go make a card for my sister.  I will always remember how funny that was, and, yes, I made her a Flag Day card.  She was hysterical and this is my 10th year of sending one to her.    I thought I would share it with you today.

Supplies:
Stamps: Stampsmith
Paper: Ranger Core-dinations, Stampin' Up
Misc.: Cuttlebug Star Embossing Folder, Spellbinders Deckle Rectangle Dies, Tim Holtz Sander

I just discovered the Stampsmith line of stamps at a stamp show a few weeks back.  I fell in love with their images.

My husband Alan liked this card.  He asked if I could add another person to my Flag Day list and send one to his friend, who is a history professor.  So now there are two people getting cards this year.

On a serious note, please take a moment to honor our flag and give it the respect that it deserves.  So many have given the ultimate sacrifice so we can live freely and fly it with pride.

Have a great day, guys!

Sunday, June 3, 2012

Happy Anniversary Card - Nature Inspired

Hi, guys!  I thought I would share a card I made for a friend's husband to celebrate their second wedding anniversary.


Supplies:
Stamps: Stampers Anonymous
Ink: Archival Black,  Distress Ink, Dylusions Spray Inks
Paper: Watercolor Paper, Gina K Designs 
Misc.: Ribbon, Gems, Oval Punch, Computer Generated Name, Distress Tool, Heart Button

I wanted to make this different than I normally do for anniversaries.  I normally would use red, white, pink or something like that for anniversaries.  I wanted to make this look natural in feel and use a different color palette.  I thought the use of the spray inks would be fun.  I love their vibrant colors and how easy they are to use. My fingers got incredibly inky when I made this card!   I can't believe it has been two years already since my friend married Seth.  I am so happy that they found each other.

Have a great day!  I hope you find some time in your day to do something you love!

Wednesday, May 2, 2012

Mother's Day Cards - Part I

Hi, guys!  Mother's Day is almost upon us, so I thought I would start sharing some of the cards I have been making for this holiday.  I plan to share a bunch with you over the next few days, so I am going to post the pictures of the cards, but not the long supply lists for each.  If you have any questions about a card, just shoot me an email and I will get back to you.

This first card was made for a friend's daughter.  She loves tattoos and I thought this would be a great card for her.  I used my Distress Markers to watercolor the image.


The next two up are floral cards I made for some co-workers to give.


I hope you like them.  I have made 25 or so for this holiday, and have 7 more to complete this weekend.  I plan to put more up on Friday.

Have a great night!

Tuesday, May 1, 2012

April 2012 Tim Holtz Tag

Hi, guys! I finally got my April Tag done.  I barely got it done before the clock turned to May.  I can't wait to see what Tim does for May!


I love stamping on the embossing folders and then embossing the tag.  I had fun inking with Distress Inks and using grungeboard shapes.

Hope you like it.   I have been very busy lately with Mother's Day and Communion Cards. I hope to share a bunch of them with you later this week.

Have a great day!  I hope you find some time in the day to do something you love.


Friday, April 20, 2012

Floral Cards for April Design Team for The Ink Pad

Hi, guys!  Hope your day is going well.  I thought I would share two more cards I made for The Ink Pad this month.


This month I did a bunch of floral cards.  I love that even though they had flowers on them, they were all very different in look and feel.   Personally,  I am not much of an earth tone kinda gal, but ended up loving the papers so much that I had to go to the store and pick up a supply for myself.  The card stock is from a 6x6 pad from a company called Canvas Home Basics.

I also had to use Stickles in Star Dust.  So I applied it directly to the stamped flower image above and in the light it twinkles so nicely.   I love Stickles and have them in so many colors.  I am definitely a glitter and shine kinda gal.

One other tip I have for you is to use your markers to color ribbon.  I had a piece of pale pink ribbon, but you will see on today's cards and the cards that follow later this week that the ribbon is not that shade any more.  I colored it with matching Copic Marker colors to match the focal image.  It is a fun way to get even more use out of your supplies.

Hope you like them, and hope you have a great day!  I can almost feel the weekend upon us!!

Wednesday, April 18, 2012

My First Submissions for The Ink Pad Design Team

Hi, guys.  A few weeks ago I mentioned that I was named to the new design team for a great stamp store in Manhattan called The Ink Pad for a period of 4 months.   I just turned in my first assignment of 6 cards.  I will be sharing them with you the next few days.  I used Ranger Archival inks, Tim Holtz Distress inks (no surprise there) and Adirondack Earthtones ink.  The first card I used Cherry Sorbet Twinkling H2O's for the flowers and on the sentiment.


I had a blast making these cards.  They both incorporate my love of distress inks, but they also made me step outside my comfort zone and do a lot more with earth tones than I normally do.

I hope you like them, and if you have any questions about them shoot me an email and I will get back to you.

Have a great evening!

Monday, April 9, 2012

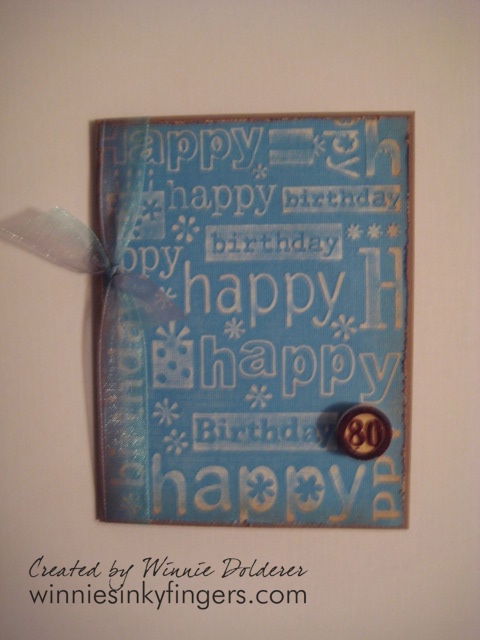
Don't Distress 80 - Celebrate it!

Hi, guys!  Hope you had a great holiday weekend.  We had a very nice one.  I was asked by a co-worker to make a 80th birthday card for an attorney who used to work with us.  It was fun to make.  I wanted it to have a masculine feel and also a distressed look.  I sure hope he likes it.


Supplies:
Paper: Ranger Coredinations (Broken China)
Ink: Tim Holtz Distress Ink, Copic Markers
Misc.: Tim Holtz Bingo Chip, Ribbon, Sanding Block, Cuttlebug Birthday Embossing Folder


This was the second 80th birthday card I have made these last few weeks.  It is such a thrill to make cards for people, but it is so exciting to make them for people experiencing milestone birthdays.  I often wonder why so many people don't want to celebrate each and every birthday with joy and happiness. So many worry about their age, or aging in general.  I know from personal experience that each and every year you are given is a gift and should be enjoyed to the fullest.  So, whether you are turning 40, 50 or even 80, kick up your heels and raise a glass to another year ahead.

Hope you have a great day, and find a few moments in your day to do something you love.

Monday, April 2, 2012

Creative Chemistry 101 - The Finale

Hi, guys!  I hope you all had a great weekend.  I enjoyed it very much as I was able to complete the rest of my tags for the Tim Holtz Creative Chemistry 101 class.  I thought I would share them with you now.

Day 6:  Watercolor with Markers, Blending with Markers, Stamping with Markers


Day 7:  Nostalgic Batik , Rusted Enamel, Distress Powder Resist


Day 8:  Paint Dabber Resist, Crackle Paint Resist, Shattered Stains


Day 9:  Perfect Distress Mist, Perfect Distress, Perfect Splatter Distress


Day 10:  Rock Candy Distress Stickles


This class was full of great techniques and insights.  I highly recommend that anyone who would like to learn how to use the Ranger line of products sign up for this course.  The helpful hints Tim gives you are worth their weight in gold.  It is apparent that Tim really loves what he does and encourages you to stretch yourself and your creativity.  I found some of the techniques I will use over and over, and others I will pull out when I need to try something different and have some play time.  One thing I came away with from the class is that if I have an idea, I should just try it.  It may work, or it may not, but if it does, it can be great!

Have a great day, and I hope you find a few moments in the day to do something you love!

Saturday, March 24, 2012

Tag Time with Tim

Hi, guys!  Hope you are all having a great weekend.  I thought I would share some tags that I have made for days 3, 4, and 5 of the Creative Chemistry 101 Class with Tim Holtz.

Day 3
Alcohol Ink Agates Technique

Archival Resist Technique


Stamping with Reflections Technique


Day 4
Custom Stamp Pad Technique  (I made my husband a bookmark!)

Layered Misting Technique


Day 5
Marbled Stains Technique

Stamping with Stains Technique

Stained Kraft Resist Technique


These online card classes are just great.  I love that I can work at my own pace, and around my schedule.  I also love that Tim gives you so much information, with obvious planning on his part.   I can't believe a week has flown by.  One more to go!  I know I will be sad to see it end.  But, with all this newly acquired knowledge, I know I will be enjoying myself in my stamp room!  If you haven't tried one of these online card classes, I would highly recommend you give one a try.  You will have the information at your fingertips for life!

Enjoy the rest of your weekend!  I plan to find some stamping time tomorrow to.....GET INKY!
Sunday, March 18, 2012

Tea and (Vaga)bonding

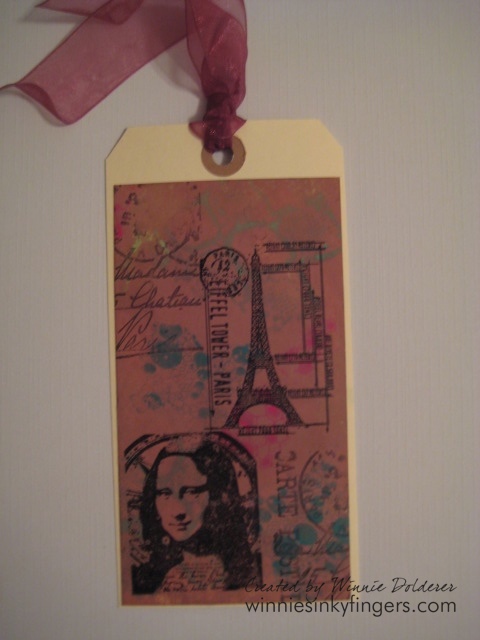
Hi, guys!  Hope your weekend was a great one.  My weekend was great and filled with fun.  I had my sister and two of my nieces over for a tea party and crafting time.  I thought I would share some pictures from the day.

After our tasty lunch and tea we headed down to my stamp area to make some tags.  The girls wanted to make some Tim Holtz-style tags after hearing about them and were amazed when they saw the Vagabond. We spent the afternoon bonding with each other over the Vagabond. A Vagabond machine is a powered die cut/embossing machine that is a wonder.  It really enables you to cut and emboss a lot of stuff in no time and with great ease (a touch of a button!)


Amanda's tag (age 7)

Grace's tag (age 4)

We spent hours making other cards and using plenty of Ranger products.  It was a blast and, yes, it was extremely INKY. Who knew that spray inks could spray so far?  I was able to introduce my sister to the wonder of the Ranger Craft Scrubbie that takes all kinds of ink off hands.  As a kindergarten teacher, I am sure it will come in handy after arts and crafts!  If you don't have one already, I would suggest you get one as they are really amazing!

I hope you have a great day and find a moment to do something you love!